
Using a Library Telescope
The Library telescope is not your typical department store telescope. With it, one can view the moon, brighter planets, such as Saturn and Jupiter, bright comets, and many "deep-sky" objects, such as star clusters, nebulae, and even a few galaxies. However, using even a simple scope for the first time can be a challenge. Working through the 3 step process below in daylight, before going out at night to observe, is essential to assure a rewarding experience rather than frustration.
(Note: NEVER attempt to observe the sun with this telescope! It will blind you.)
Step 1 – Familiarize yourself with the scope.
Find the numbered items on your scope in the list below using in the images on the right.
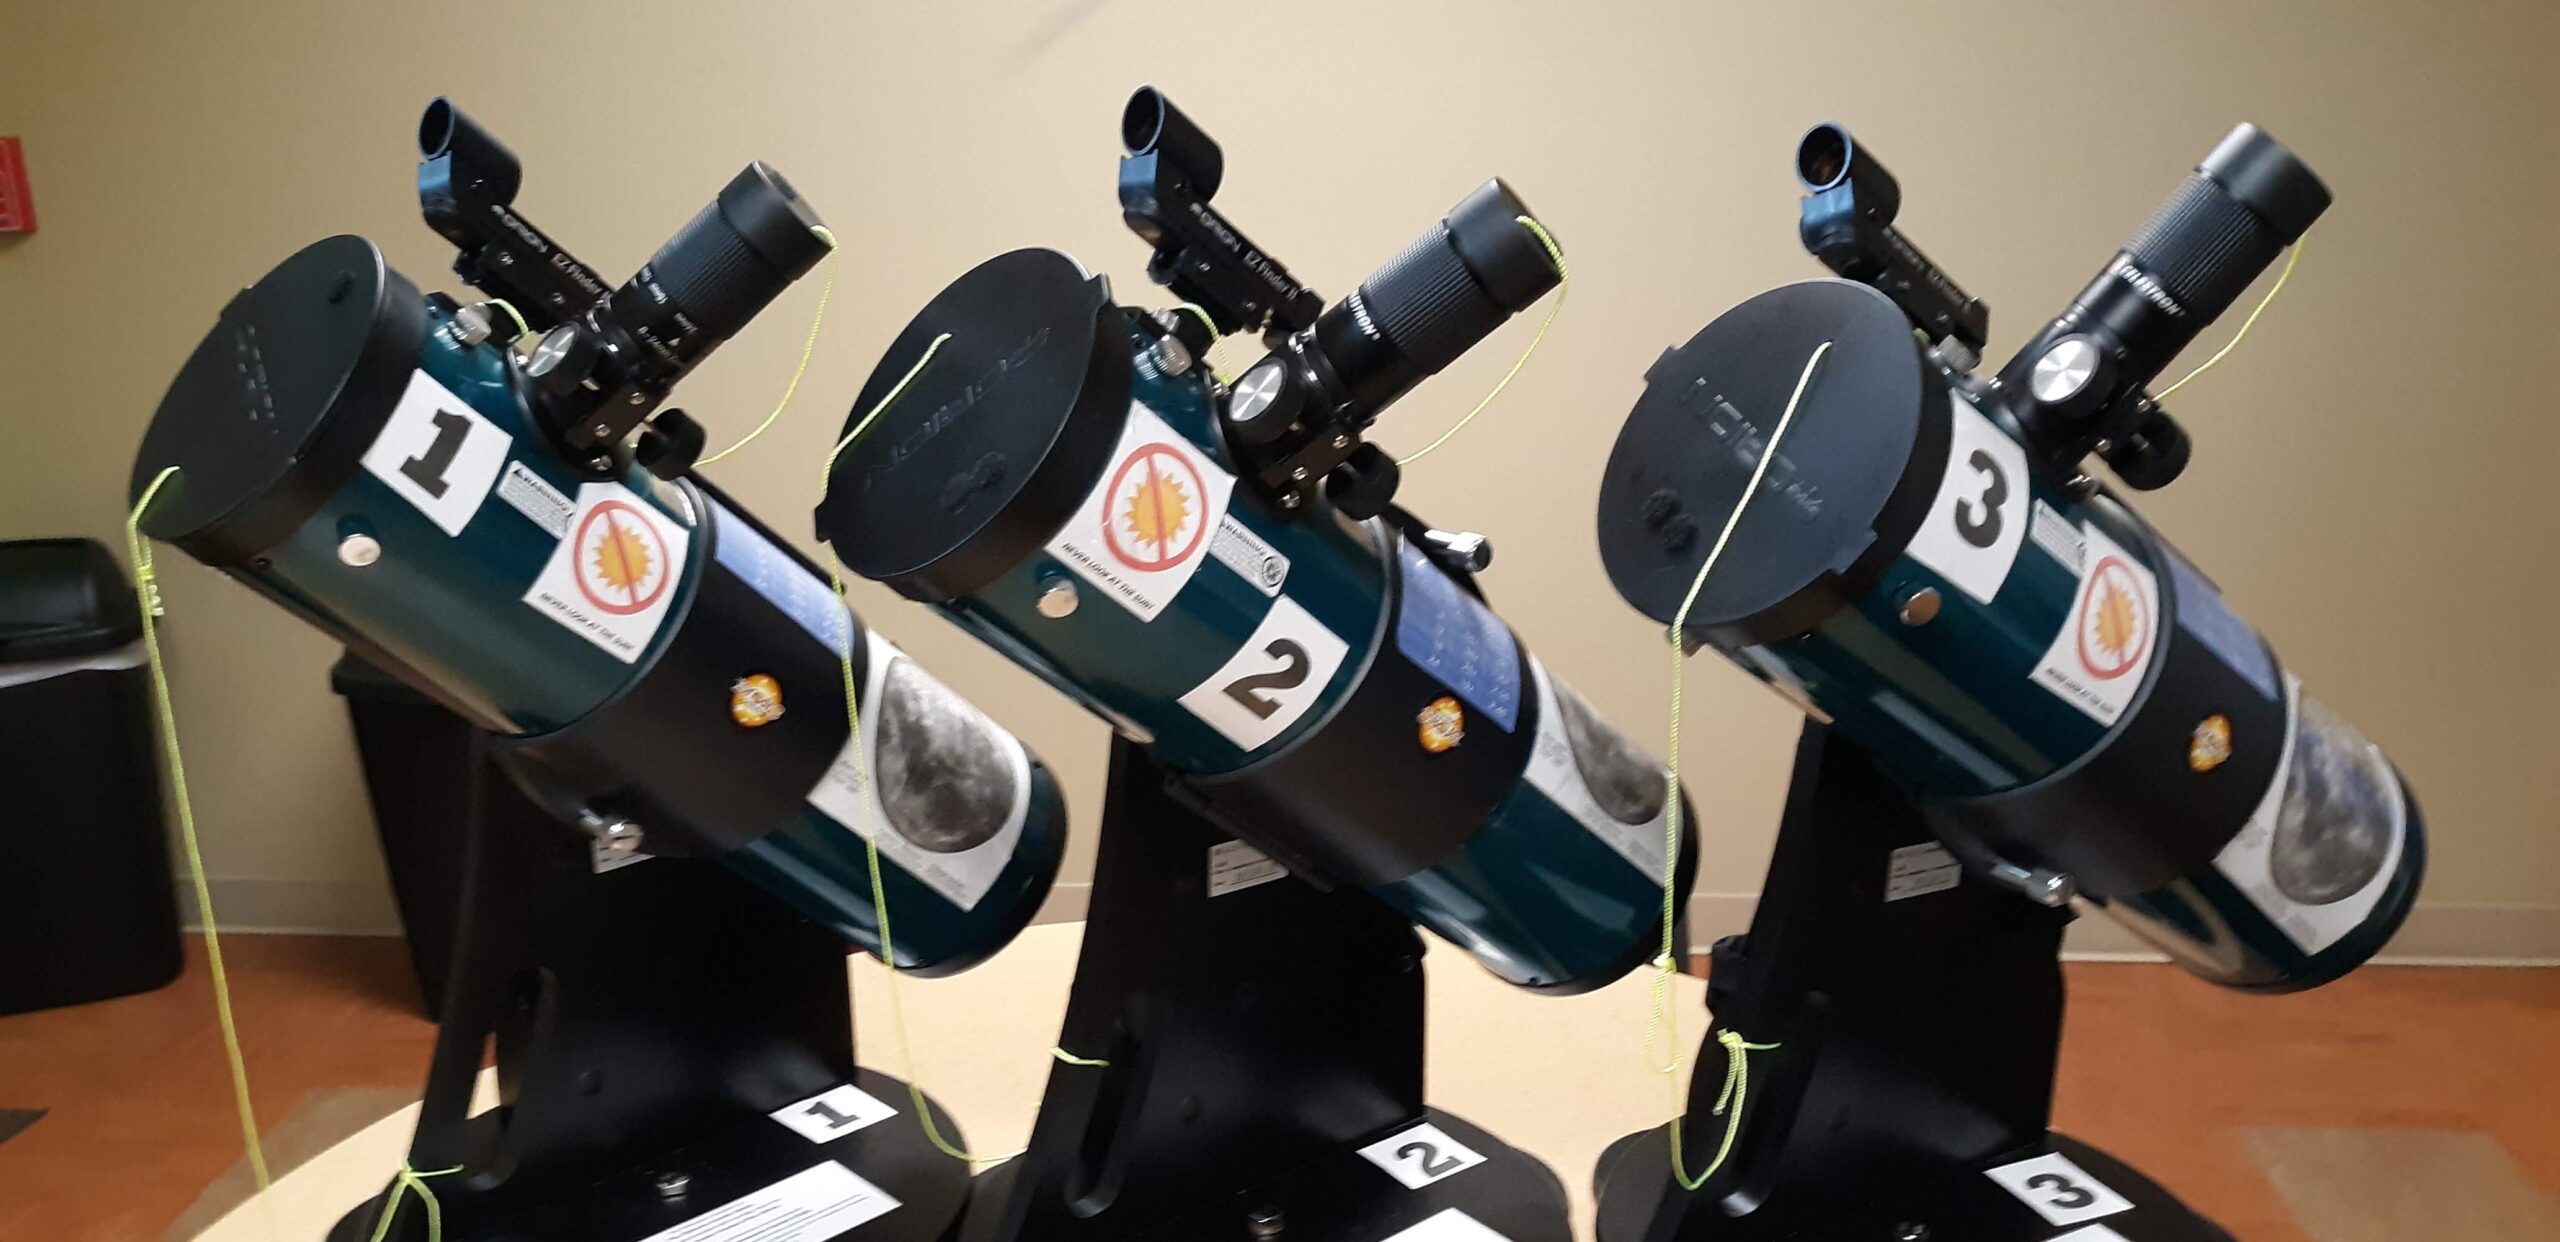
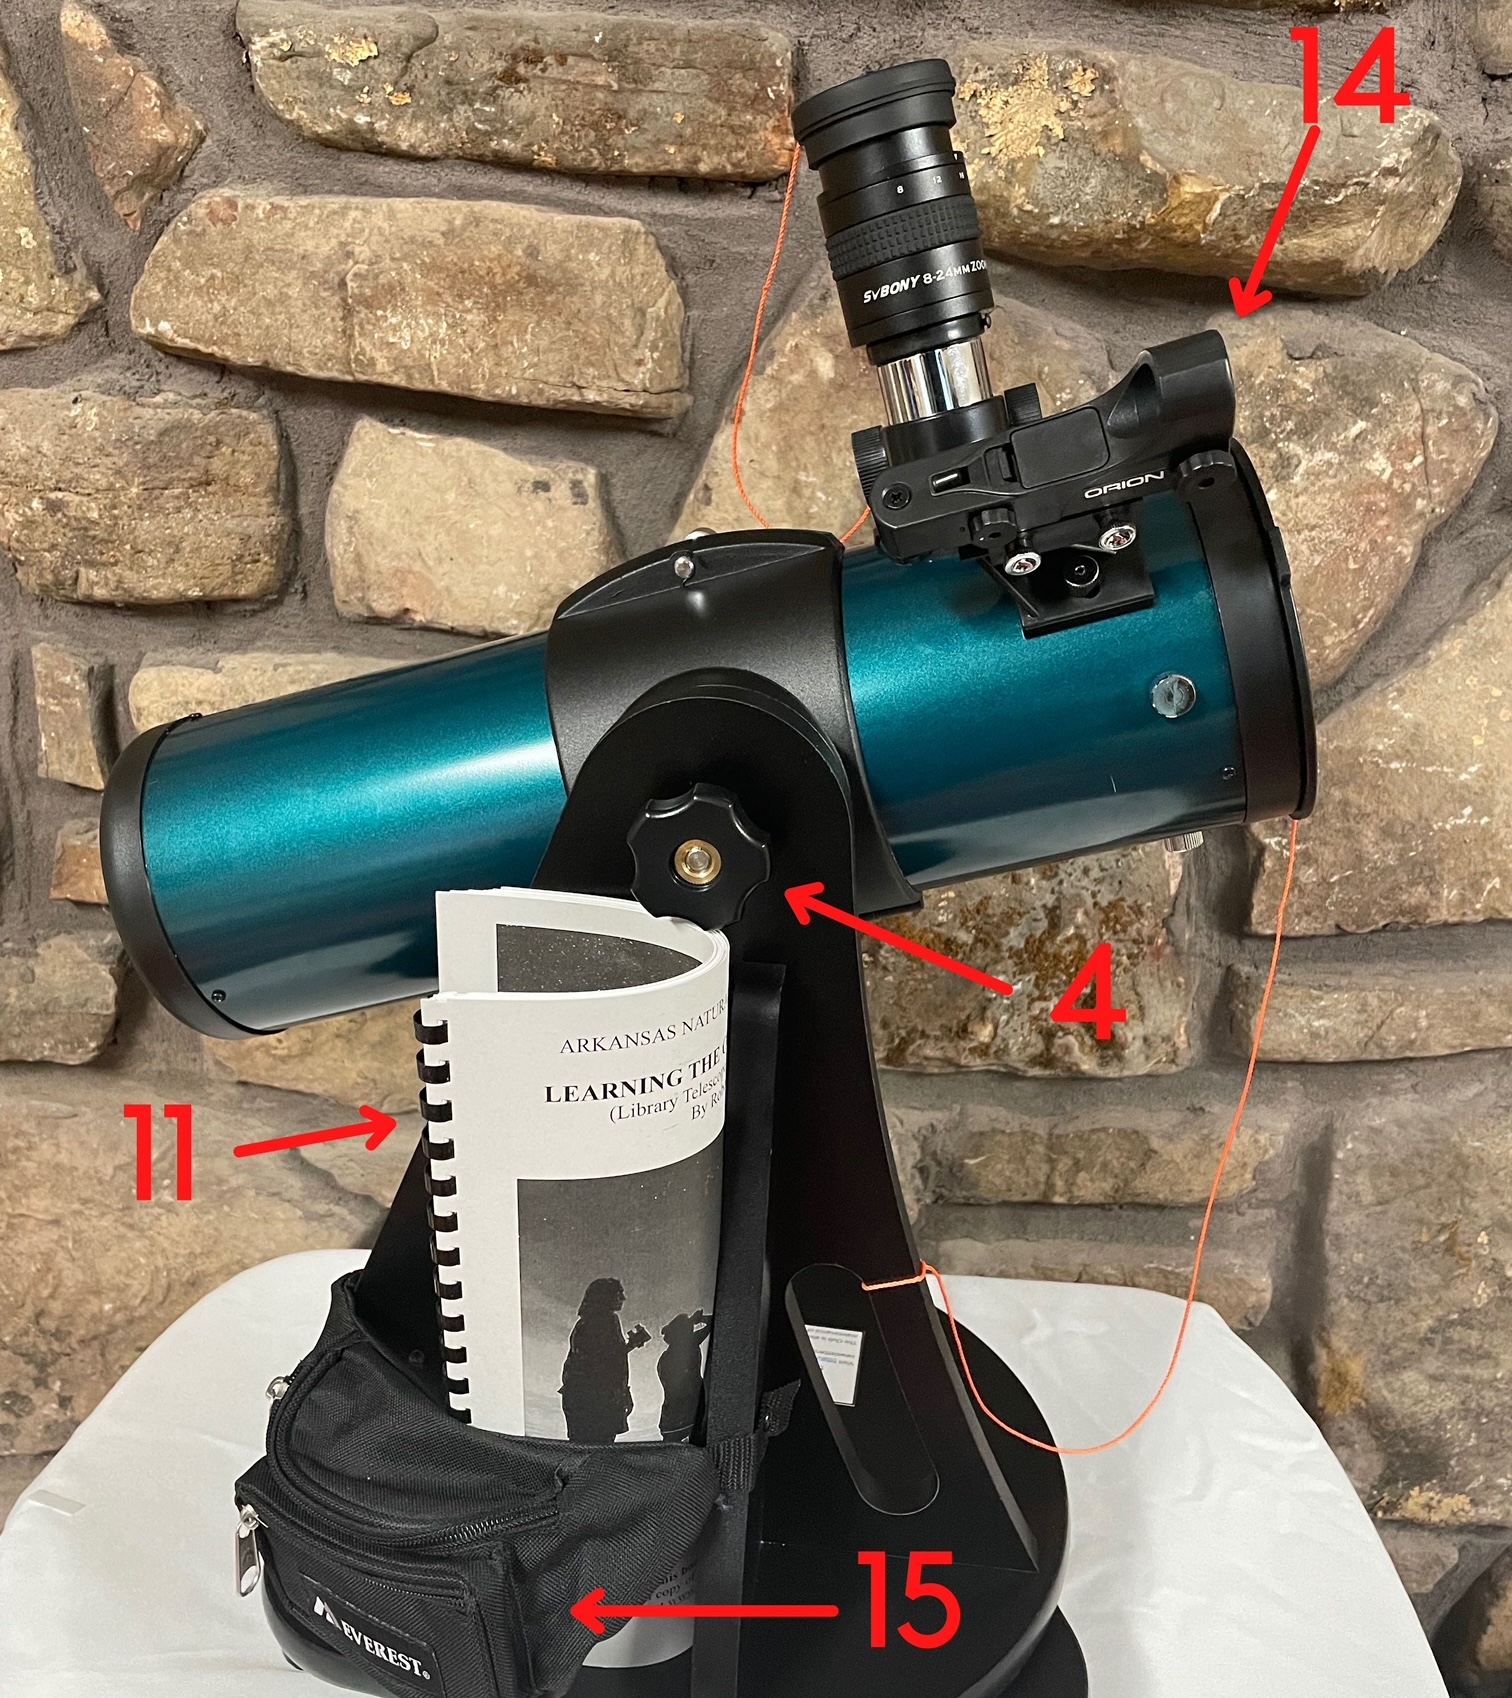
“1” handle, “2” is the base, “3” optical tube, “4” altitude friction knob, “5” endcap, “6” eyepiece cover, “7” zoom eyepiece, “8” focuser, “9” focuser knobs, “10” optical tube clamp, “11” Constellation booklet and scope manual, “12” eyepiece power chart, “13” never look at the sun decal, “14” finder, “15” accessory pack.
(Note: Some scopes don’t have zoom eyepieces. Instead, you should find two fixed focal length eyepieces in the accessory pack. Some scopes have a red “saddle” or "peep" sight, others a battery-powered red dot finder. Some scopes come with a field guide and a separate scope manual, while others have the Learn the Constellation guide with the manual printed in the back.)

Step 2 – Learn to use the scope and verify everything is working and properly aligned.
• Take the scope outside, preferably to where you intend to use it at night, and set it on a stable surface. To transport the scope use the handle with one hand and place the other hand under the base as shown to the right.
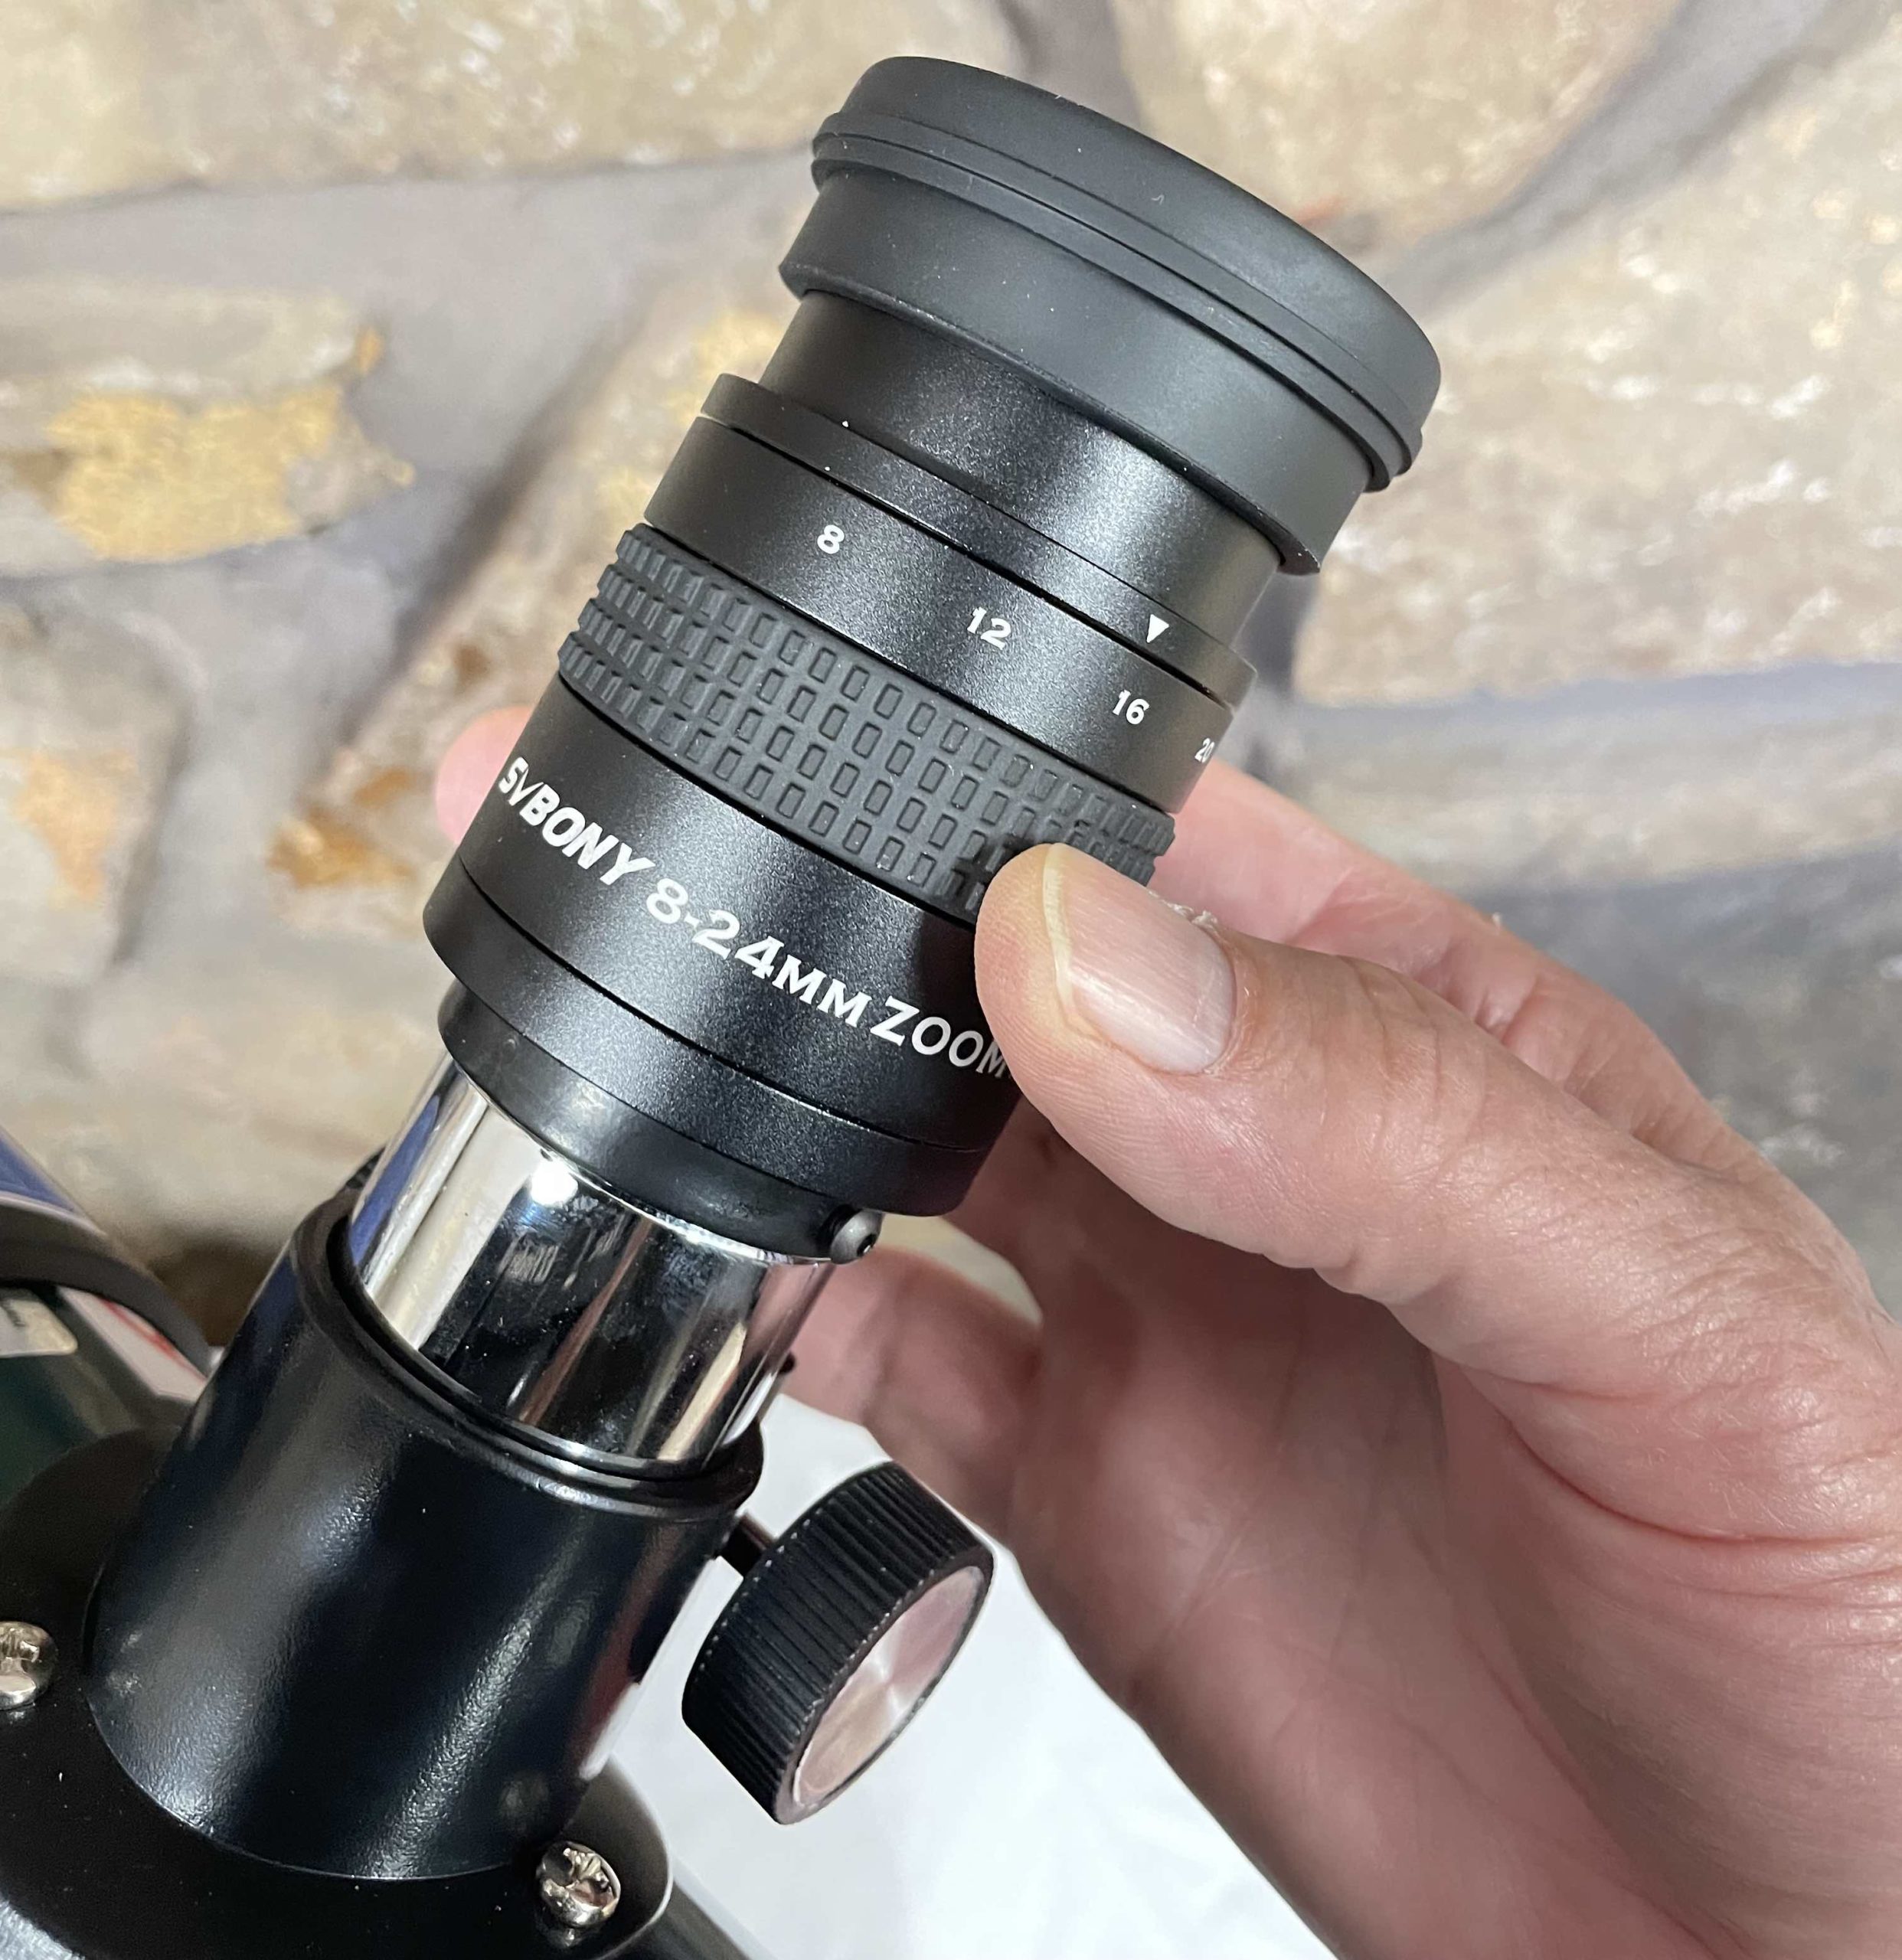
• Remove the end cap and eyepiece cover from the zoom eyepiece and turn the knurled portion of the eyepiece to the largest number. This will give the lowest power and the largest field of view. If using a non-zoom eyepiece, look in the accessory pack for the eyepiece with the largest number and place it in the focuser.

• Loosen the tube clamp just enough that you can rotate the optical tube so that it is easy to look through the eyepiece and the finder. While you are at it, with the altitude friction knob loose, slide the tube forward or backward in the cradle as needed to roughly balance the tube. Then tighten the tube clamp and also the altitude adjustment knob just a bit. The scope should swivel left-right (azimuth) and up-down (altitude) easily.
• Now point the open end of the scope at a distinct distant object, like the top of a power pole, and turn the focusing knob to focus on the object. Wow! You are using the instrument, but we are not done yet. We need to check finder alignment.
Confirming that the finder is aligned with the scope is done a bit differently depending on the kind of finder on your scope.
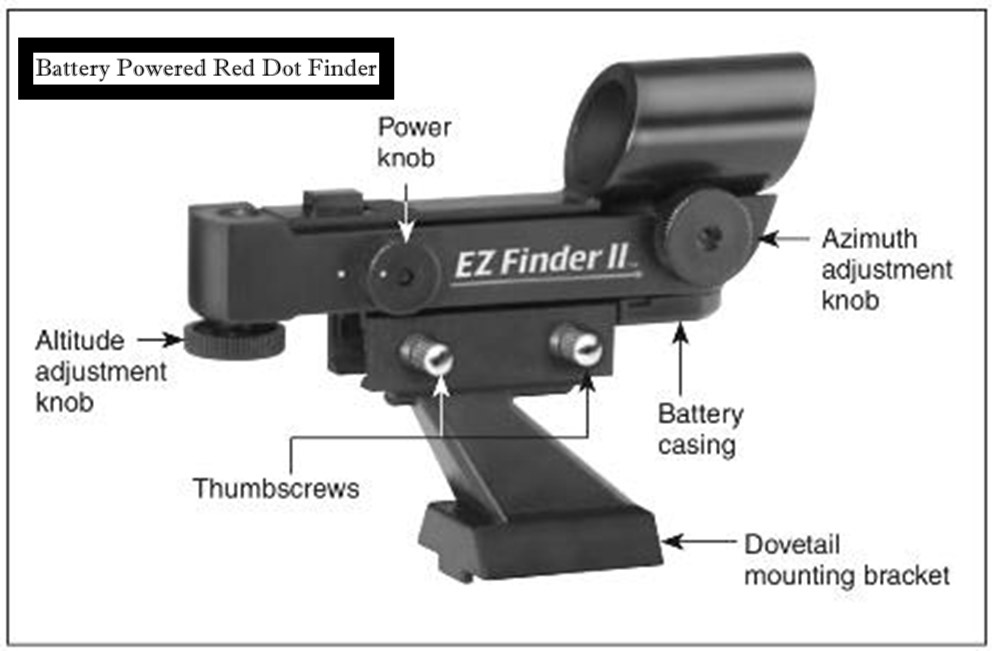
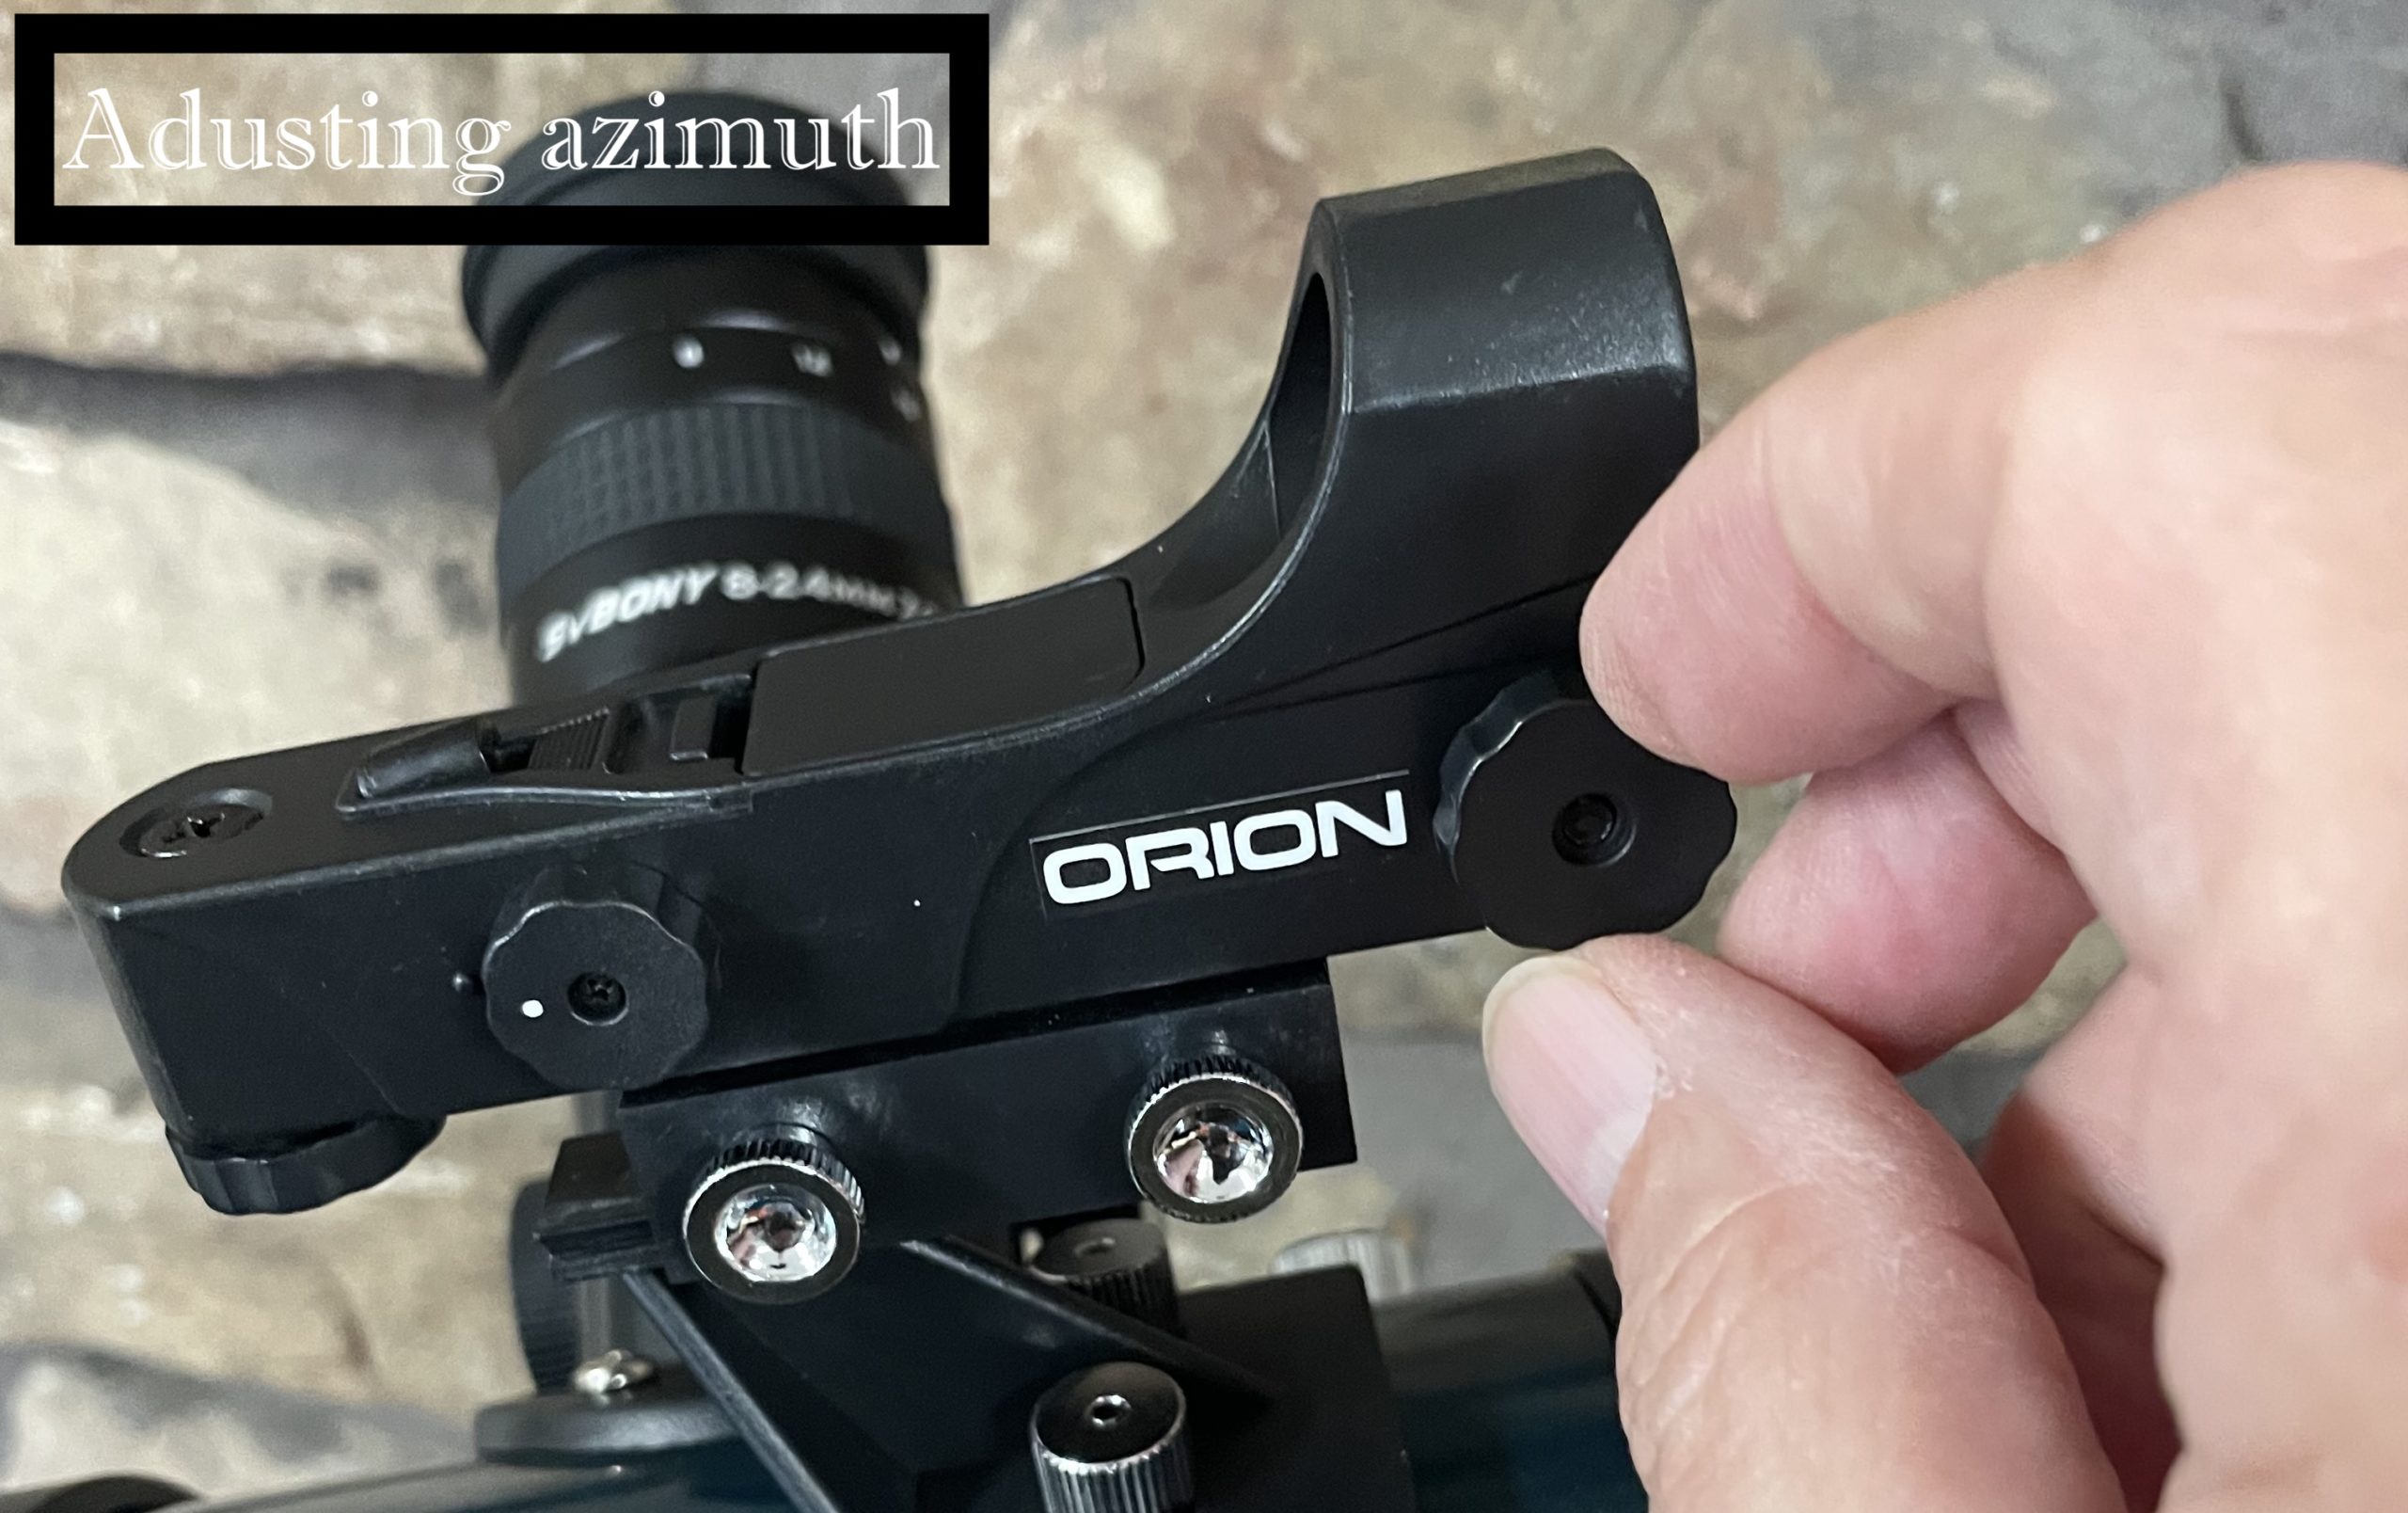
Red Dot Finder-
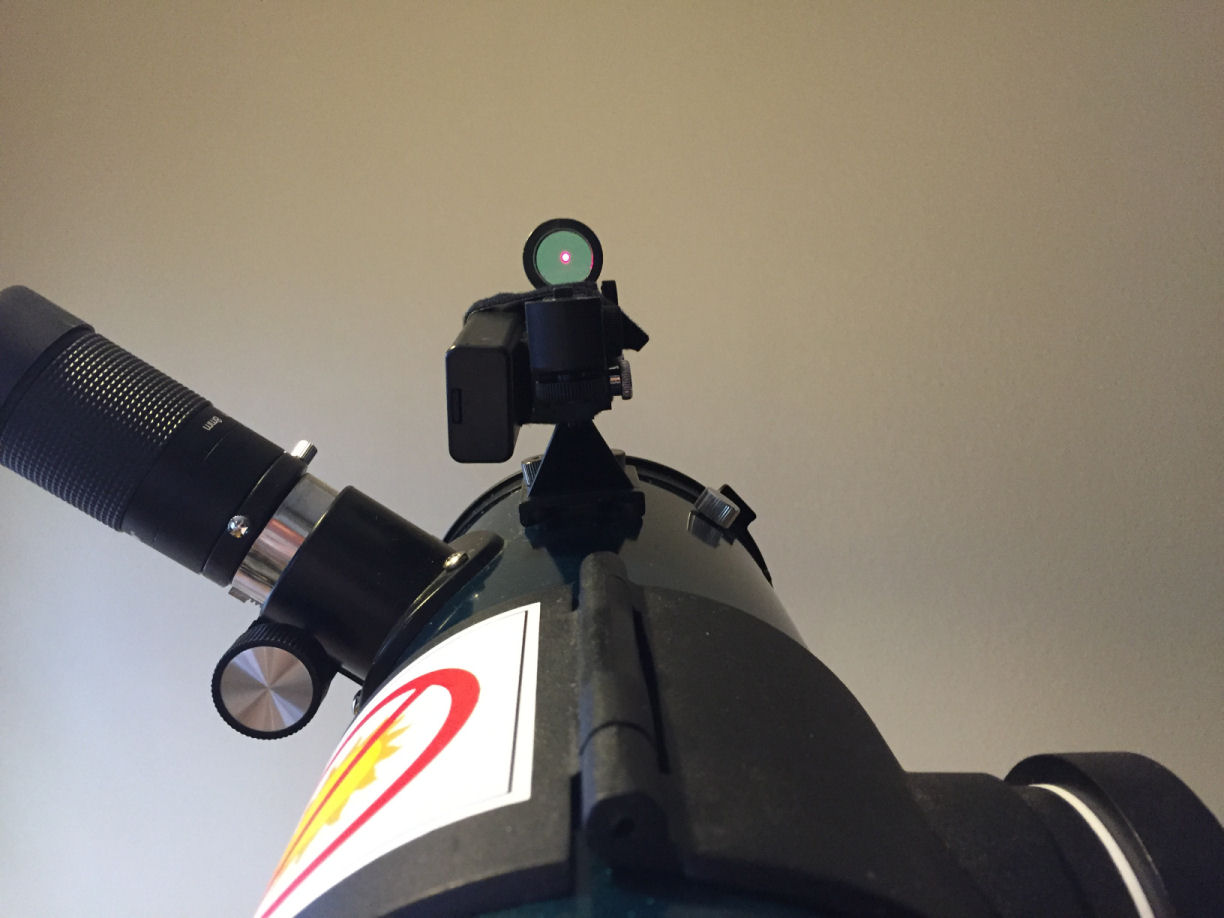
If using a red-dot finder, as shown in the pictures above or to the right, turn it on all the way and look through it from the backside. The red dot should be visible and centered on the object in the scope. If not, use the altitude and azimuth adjustment knobs on the finder to center the red dot on the target. It does not have to be perfect. If the target is near the center of the field of view in the scope on low power when the red dot is centered on the target, you are good to go.
When using the red dot finder at night you will want it as dim as you can get it and still see the dot. Oh, and turn off the finder when you are through!
(Note: If the dot is not visible make sure you are straight behind the finder. If it still does not show up the battery is dead. Some use a 2032 disc battery. Use a knife or small screwdriver to lift one end of the battery while using another tool to push it out so you don't bend the contact.)
Saddle Peep Sight Finder-
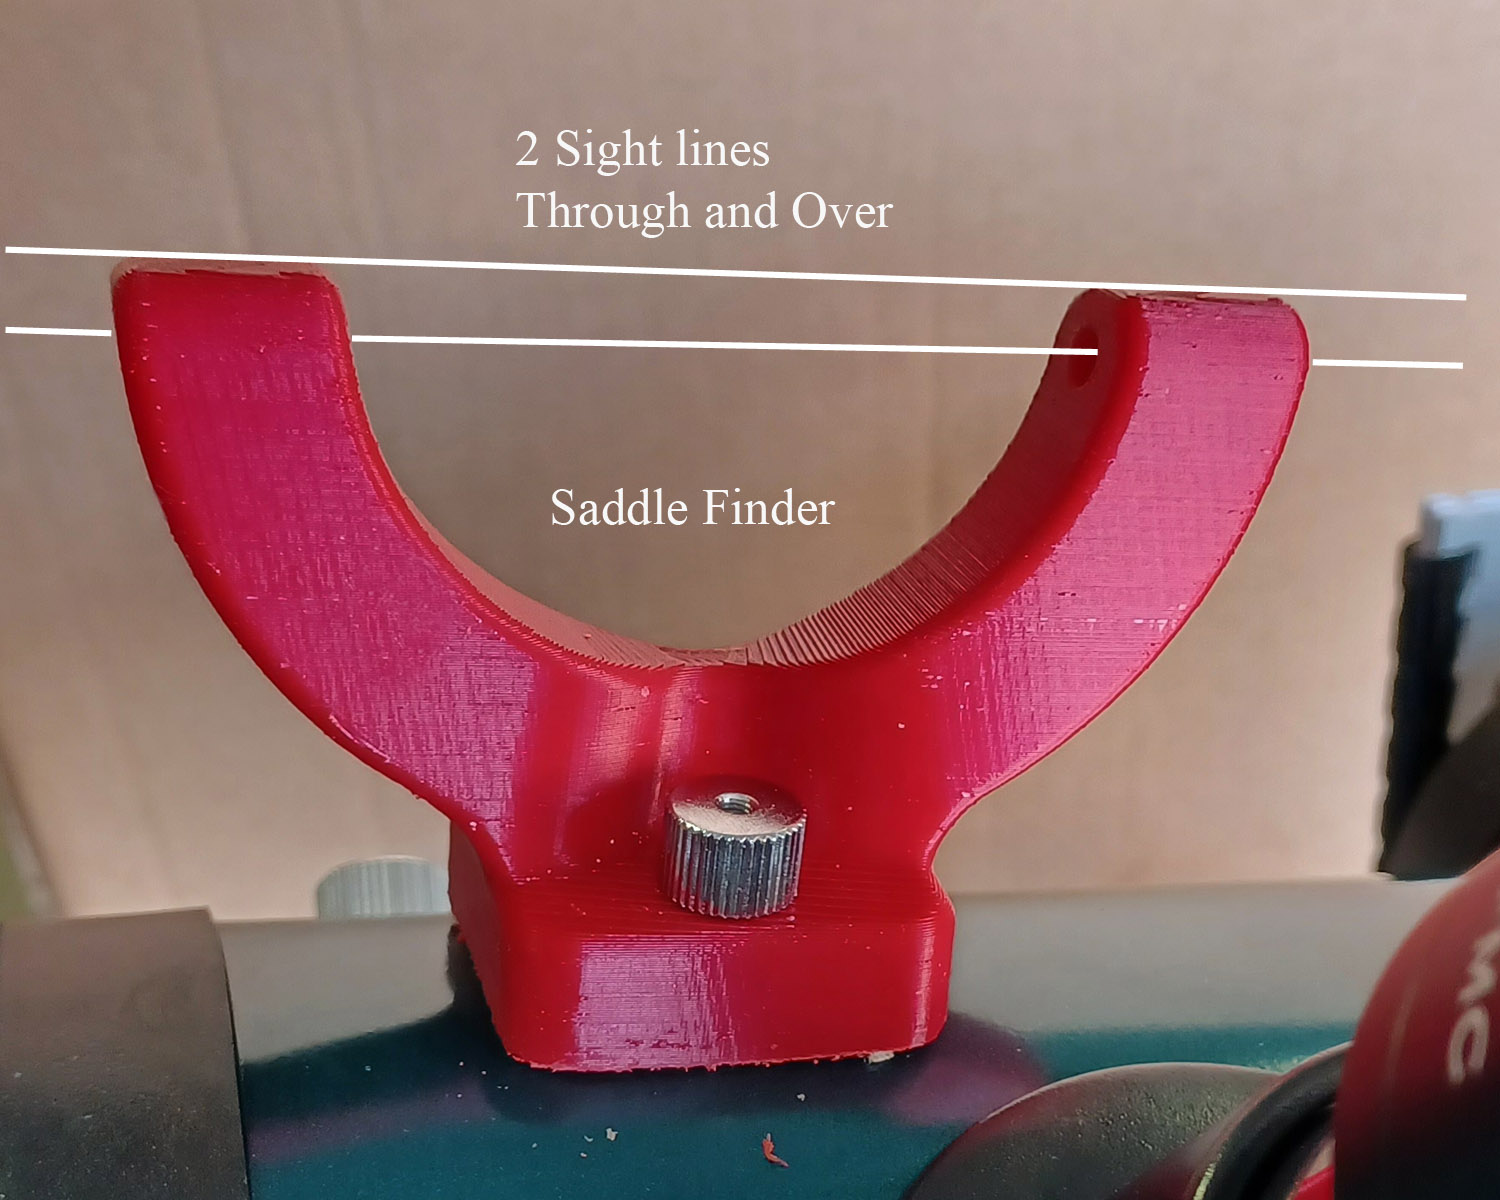
The process is similar and the goal is the same using the saddle-style peep sight. The difference is instead of aiming a dot you center the target, such as a star or planet while looking through the holes in the saddle arms as shown to the right. If the sight requires adjustment you must loosen the nuts holding it just enough to realign it with the scope and retighten.
• Now using the finder, point the scope at several different distant objects. Hey, if the moon is up, take a look-see, but again, Don’t point the scope at the sun! If using the saddle-style peep sight, try aiming by looking over the two ends rather than through the holes. When aiming at the location of a dim object not visible to the naked eye, this will be the best way to aim with it. Make sure that the two ends are carefully aligned - the front piece is hidden behind the back one and placed just under where you want to view. Now you're ready to go!
(Note: Always use the lowest power to find objects because that provides the largest field of view. Once centered, you can turn the power up if you like.)
Optional - view this UALR TV 12-minute video (Abbreviate the video by skipping to the how-to section at 2:20').
Step 3 – Congratulations, now plan an outing.
First night out - start simple.
The moon and bright planets are the easiest targets. Go here to find out what bright objects are up and where to find them in the sky.
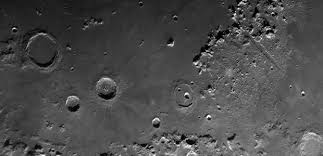
The Moon - The moon is easy to find, but it is helpful to know when it rises and sets for your date, time, and location. There are many moon calendars available online, but this site will suffice. During the crescent phases the topography stands out, even the smallest craters have terrific detail. When a crescent moon is getting larger (waxing) it will be in the evening sky east of the sun. Past full, a shrinking (waning) crescent moon is a morning object west of the sun. When the moon is full or near-full, it rises in the east as the sun sets, is overhead at midnight, and sets near dawn. When full, sunlight is shining straight down onto the lunar surface, casting fewer shadows and making it more difficult to see surface details, but the light-colored rays coming out of younger craters are easier to see. You might consider scheduling your checkout so the moon will be in a good position for viewing.
Second Night Out - Kick it up a notch.

Finding double stars is just a tad harder than finding a planet because you will need to identify the constellation they are in to track them down. If your library telescope comes with a copy of Learning the Constellations, the short video below by the author, Rocky Togni, will explain how to use the guide to get oriented in the sky and find your way through the constellations. If your scope did not come with that guide, you can download the key charts from it here, or you can order a personal copy here. Downloading and printing a free copy of the current month’s SkyMaps may also be helpful.
Once you learn to identify the constellations, you have opened a whole new world of interest. But, before exploring that further, let’s find and split at least a few of the double stars below. Oh, and go back and check the moon and planets out again, you may see more the second time and with the moon and Jupiter, things will have changed.
Third and Subsequent Nights - Star Hopping.
Okay, honestly, if you get to this point you are a telescope genius. Most people will do good to see the moon and a few planets on a first checkout. But there is much more to explore, among the so-called "deep-sky" objects located outside our solar system. But, you will need to get outside the city under darker skies, a state park, national forest overlook, small-town park, or a farm. You will also need to learn to “star hop”. This means finding an object of interest on a chart and starting with a bright star nearby move the scope from star to star or between stars until you arrive at the object.
Again start with easy-to-find objects located near easy-to-see stars – open clusters are often the easiest deep-sky objects, globular clusters next, and a few galaxies. The inside back cover of Learn the Constellations has a list of the easiest objects for each season. Below is a similar by-season list of deep-sky objects most suitable for viewing with an LTP telescope. This is actually about half of a larger list of objects compiled by the eighteenth-century astronomer, Charles Messier, who made the first catalog of
Messier Deep Sky List: [Adobe PDF] [MS Excel 2013]
You will have to check the scope out many times to see all of there is to see in a library telescope.
I hope this guide has been helpful. When you take the scope back to the library please, please, please take five minutes to tell us about your experience and any suggestions you have or problems you experienced. Also, remember if you hit a snag along the way or something does not seem right about the scope, do not hesitate to email for help. LThelp@darkskyarkansas.org